Creating an R package for your final project (locally)
1. Creating a new R package in RStudio:
- File -> New Project -> New Directory -> R Package
- Enter a good name and folder for your package. I’ll call mine
portaldata - Click “Create git repository”
- Click “Create Project” button to create your new project
- What is an R package? A repository that contains:
- Metadata (what is metadata) in a DESCRIPTION file
- An R/ folder that contains R code
- Packages can also contain data. If there’s a data/ subdirectory in the package directory, R will make any data files there available under the package namespace.
2. Customize the DESCRIPTION file
- Give your package a good
TitleandDescriptionTitle: Short description of your package Description: Longer description of your package. You can add references and other citations here. - If your
Descriptionor any other entry spans multiple lines, make sure to indent each line - Make sure you have the format for
AuthorsandMaintainercorrect; R is picky about that. For example:Maintainer: Luna L. Sanchez Reyes <sanchez.reyes.luna@gmail.com> Authors@R: person("Luna L.", "Sanchez Reyes", email = "sanchez.reyes.luna@gmail.com", role=c("aut", "cre")) - Include which version of R your package depends on, usually the one that we are using now is the best (only exception is if you use functions from another package that requires an older R version):
Depends: R (>= 4.2.2) - You may have to add more dependencies but since this is only a data package, R is our only dependency for now.
- License:
License: GPL (>=2)
3. Adding a README
- This is a simple markdown file (extension
.md). - We can create a template one with function
use_readme_md()from packageusethisinstall.packages("usethis") library(usethis) use_readme_md(open = FALSE) - Customize it!
4. Adding data to the package
- We are going to be using the package
devtoolsa lot here:install.packages("devtools") - The function
use_data_raw()from the packagedevtoolscreates a folder where we can- Document the creation of our datasets
- Store the raw data in traditional computer redable formats, such as CSV.
- Save the file
portal-species-taxonomy.csvin thedata_raw/folder. If you do not have it, you can download it from here - This file contains a taxonomy table of the species from the Portal Data base
- Create a new R script file called
data-prep.R - Save it in the
data_raw/folder - Write down code to read
portal-species-taxonomy.csvinto R:read.csv()
- SIn teh same script, use the function
use_data()to save the data in R format:use_data(YOUR_DATA_OBJECT_NAME, overwrite = TRUE) - This function creates
RDatafiles in thedata/folder - This allows to load the data from within R
- Note that
use_data()overwrites any pre-existing files with the same name.
5. Documenting the data
- Create a new R script file clled
data.R - Save it in the folder
R/ - The following lines document the R package and the
taxonomydata frame - They use a special markdown that allows creating the documentation pages
- As with the
Descriptionfile, the first line is the title of the object, as a short description - The second line is a longer description:
#' Portal Data Set and Analysis
#'
#' This package contains data sets from the Portal Project
#' for easy reuse and reanalysis.
#'
#' @docType package
#' @name portaldata
#' @aliases portaldata portaldata-package
NULL

#' Taxonomy of species sampled
#'
#' A data set containing the taxonomy of species sampled for the Portal Project Data.
#' We followed the taxonomy from the Open Tree of Life .
#'
#' @source \url{https://lunasare.github.io/spring2023-data-science/data/portal-species-taxonomy.csv}
#' @format A data frame with X number of columns and Y number of rows
"taxonomy"
- One thing to pay attention in here is the name of the data object. I used “taxonomy”, but if you named it something else, you have to change that accordingly.
- To interpret the documentation file, we will use a function from the package
devtools:devtools::document() - This will create files of type
.Rdin the folderman/, which can be rendered as documentation when a package is installed and loaded.
6. Version control and remote repository
git initlocallygit addandgit commitgit init git add --all git commit -m "initial commit"- Create remote repo with the same name
portaldata. - Conect following instructions from Github:
git remote add origin https://github.com/LunaSare/portaldata.git
git push origin main
git pushall your work- Exercise: Try installing the package from another RStudio session/project:
library(devtools)
install_github("LunaSare/portaldata")
library(portaldata)
7. Creating a website for your R package
- We will use the package
pkgdowninstall.packages("pkgdown") library(pkgdown) use_pkgdown() # this creates necessary files - The function
build_site()does ALL the work of creating the website for us, it’s beautifulbuild_site() git add,git commit,git pushall the files that have been generated- If
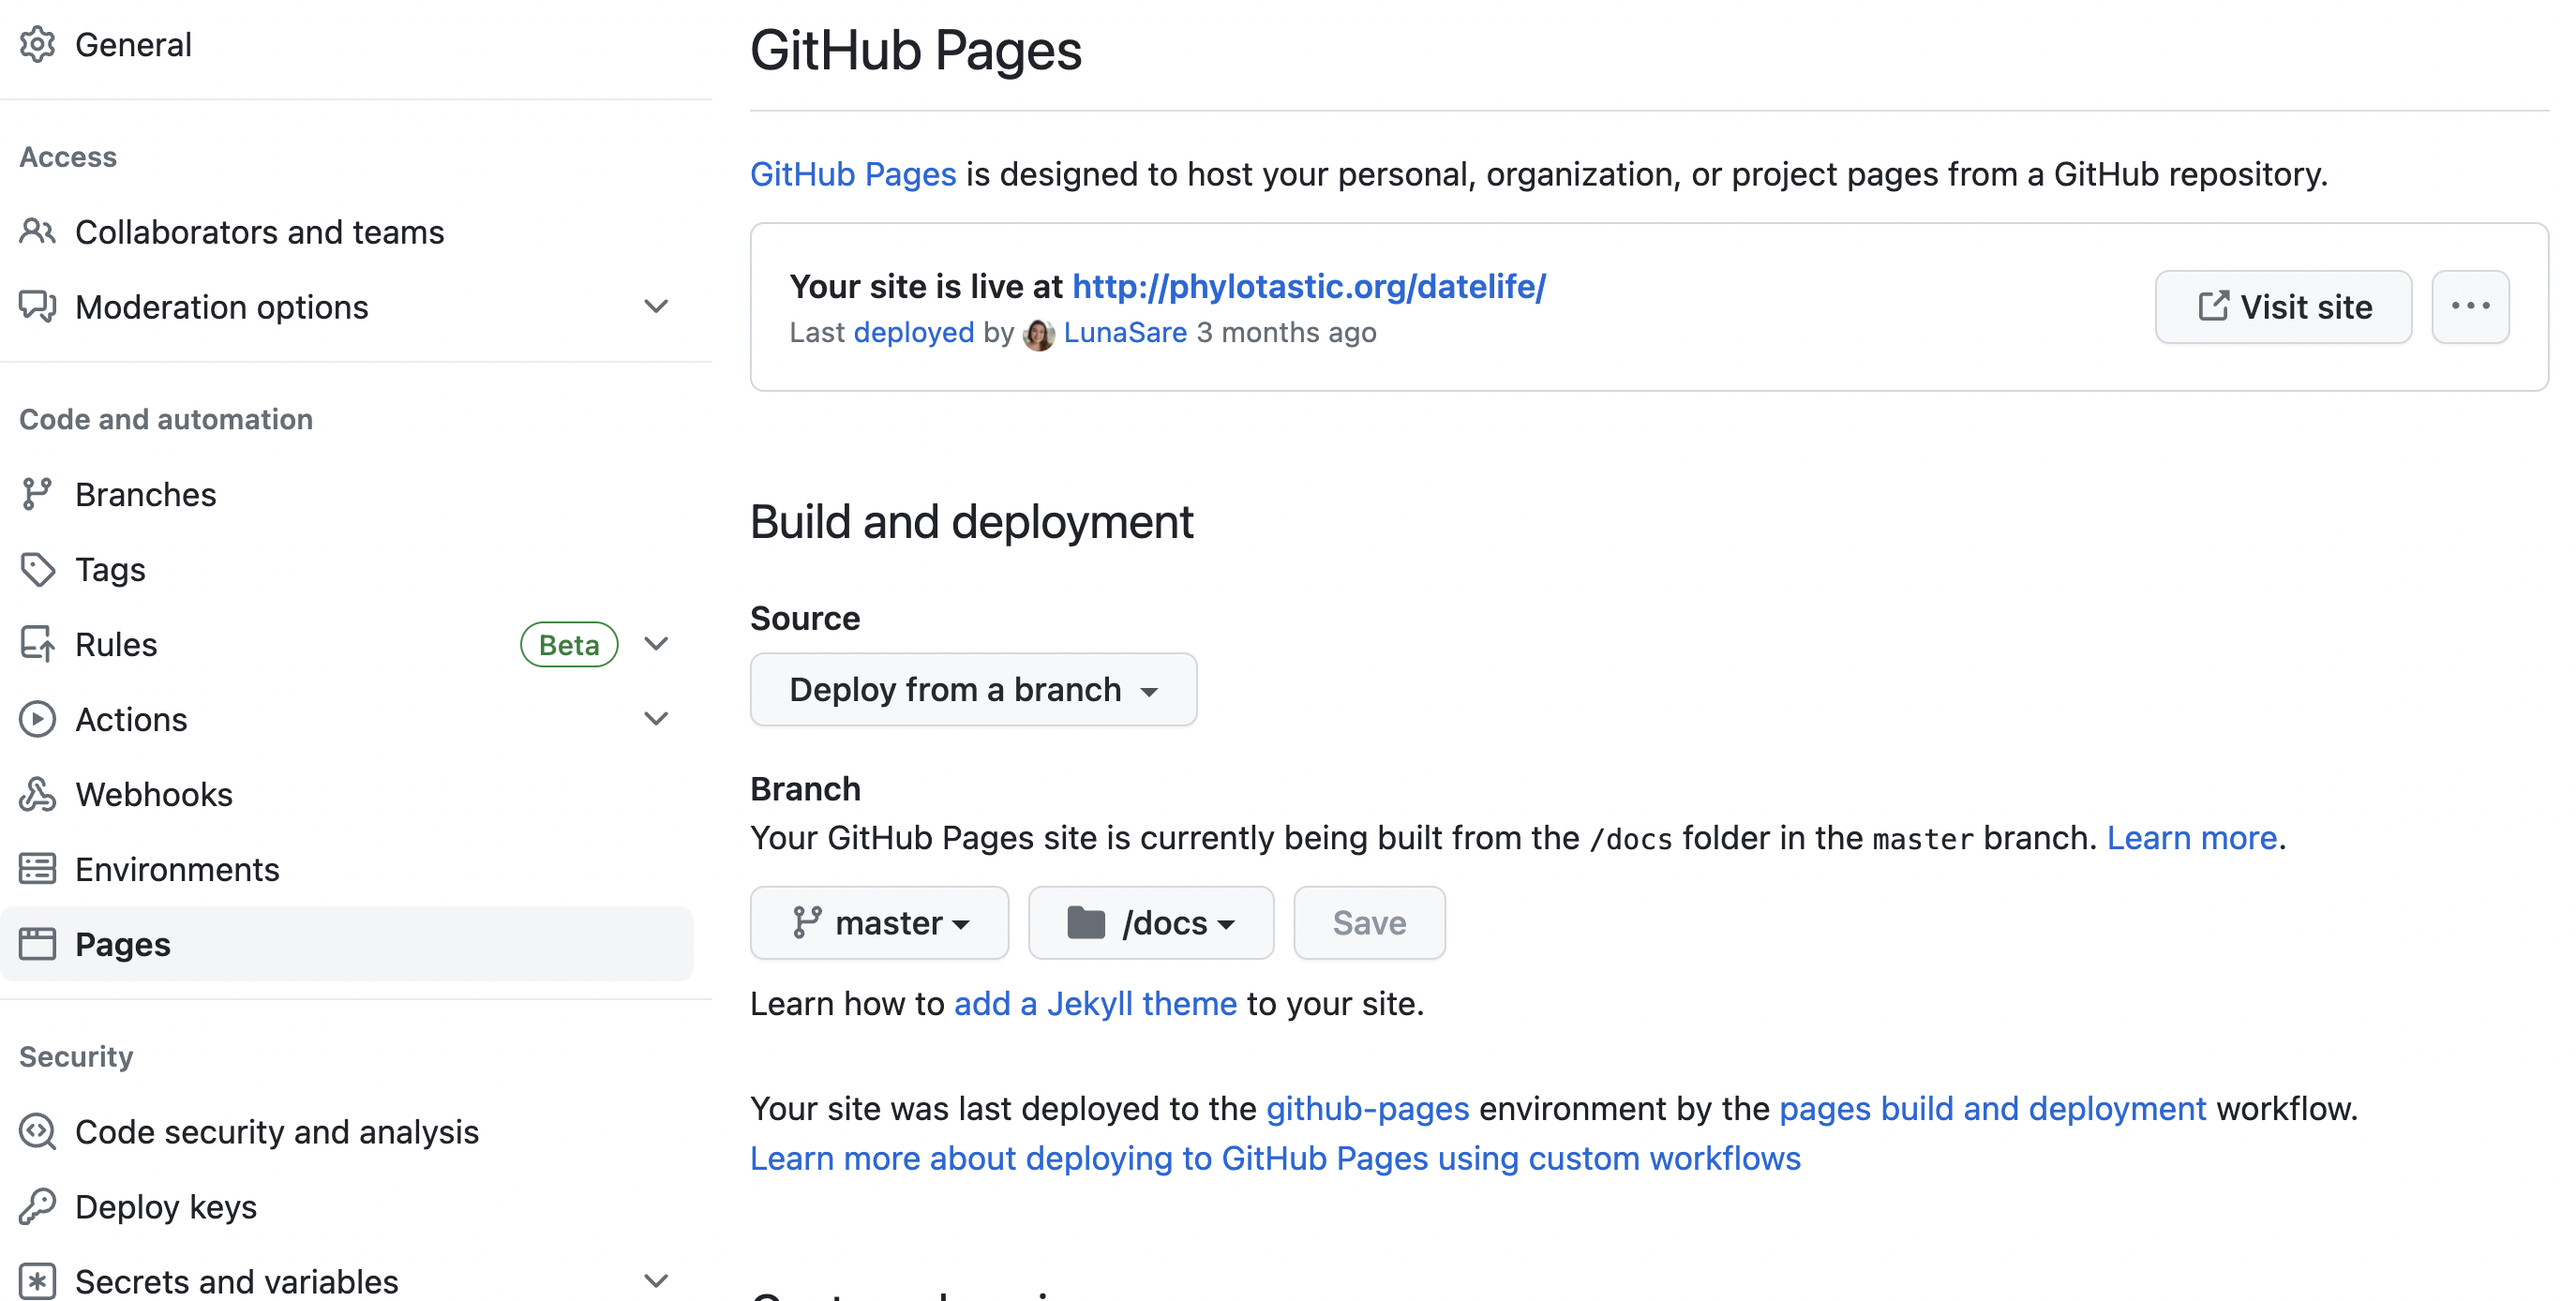
git pushwas succesful, go to the Settings of the GitHub page of your repo -> Pages section - Select the following:

8. Customize the website
- We are doing a quick customize, but feel free to try any of the suggestions on this tutorial.
- Open the file
_pkgdown.ymlyou will see the linesurl: ~ template: bootstrap: 5 - Run
buid_site()again - Explore different themes and choose one that you like.
- To add a color theme, for example “materia”, add the following line to
_pkgdown.yml:url: ~ template: bootstrap: 5 bootswatch: materia - Run
buid_site()every time you change themes to see how it looks like.
8. Adding a vignette
- Function from package
usethis:use_vignette("package_intro") - Customize the
.Rmdfile, and data-science your data!
